Imagine the enticing aroma of warm, buttery crepes swirling through yoru kitchen, inviting friends and family to gather around a charming DIY crepe station. Whether you’re hosting a casual brunch, a festive celebration, or simply craving a fun and interactive way to enjoy a classic treat, creating your own crepe station is easier – and more rewarding – than you might think. In this step-by-step guide, we’ll walk you through everything you need to set up a personalized crepe-making experience that’s as flavorful as it is delightful. From preparing the perfect batter to assembling an array of mouthwatering toppings, get ready to turn your culinary dreams into a hands-on feast everyone will savor.
Create Your Own DIY Crepe Station brings an irresistible blend of fun, creativity, and deliciousness right to your kitchen or event. Rooted in French culinary tradition, crepes are delightfully thin pancakes that serve as the perfect canvas for both sweet and savory creations. From my earliest memories of savoring fresh crepes at bustling Parisian markets to hosting lively brunches with friends, this interactive setup transforms any gathering into a warm, engaging celebration of food and togetherness.
Prep and Cook Time
- Preparation: 15 minutes
- Resting time for batter: 30 minutes
- Cooking: 20-30 minutes (depending on quantity)
- Total Time: Approximately 1 hour 15 minutes
Yield
Serves 6-8 peopel (about 18-20 medium-sized crepes)
Difficulty Level
Easy to Medium – Perfect for home cooks ready to impress guests with minimal fuss.
Ingredients
- 1½ cups all-purpose flour, sifted
- 2 cups whole milk, chilled
- 3 large eggs, at room temperature
- 2 tablespoons melted unsalted butter, plus extra for cooking
- 2 tablespoons granulated sugar (omit for savory crepes)
- 1 teaspoon pure vanilla extract (optional for sweet crepes)
- ½ teaspoon salt
- Assorted fillings and toppings (see section below)
Instructions
- Combine the dry ingredients – In a large mixing bowl, whisk together the flour, sugar (if using), and salt to ensure even distribution.
- Mix wet ingredients – in a seperate bowl, beat the eggs lightly, then gradually add the milk and vanilla extract, stirring gently until blended.
- Create the batter – Slowly pour the wet mixture into the dry ingredients, whisking steadily to avoid lumps. The batter should be thin and pourable,almost like heavy cream.
- Incorporate melted butter – Add the melted butter to the batter and mix until smooth.The fat enriches the crepes and prevents sticking.
- Rest the batter – Cover the bowl with plastic wrap and refrigerate for 30 minutes. This crucial step hydrates the flour and relaxes gluten for tender, supple crepes.
- Preheat your cooking surface – Warm a non-stick crepe pan or skillet on medium heat and lightly brush with butter. The surface should be hot but not smoking.
- Cook the crepes – pour a small ladle (about ¼ cup) of batter into the center of the pan, promptly tilting and swirling it in a circular motion to achieve a thin, even layer.
- Cook until set – Let the crepe cook undisturbed for 1-2 minutes until the edges lift easily and the underside is golden brown.Flip gently with a spatula and cook the second side for 30 seconds.
- Stack and keep warm – Transfer cooked crepes to a plate, stacking them loosely and covering with a clean kitchen towel to retain moisture.
- Repeat – Continue until all batter is used,brushing the pan with butter as necessary to prevent sticking.
Creative Filling and Topping Ideas to impress Your Guests
- Sweet Choices: Nutella, fresh strawberries, sliced bananas, whipped cream, powdered sugar, lemon juice, honey, and a sprinkle of cinnamon sugar.
- Savory Options: sautéed mushrooms and spinach with goat cheese,smoked turkey and avocado slices,caramelized onions with gruyère cheese,or roasted veggies with basil pesto.
- unique Combos: Mascarpone with honey and toasted almonds, ricotta with roasted figs and a drizzle of maple syrup, or spiced chickpea salad with fresh herbs.
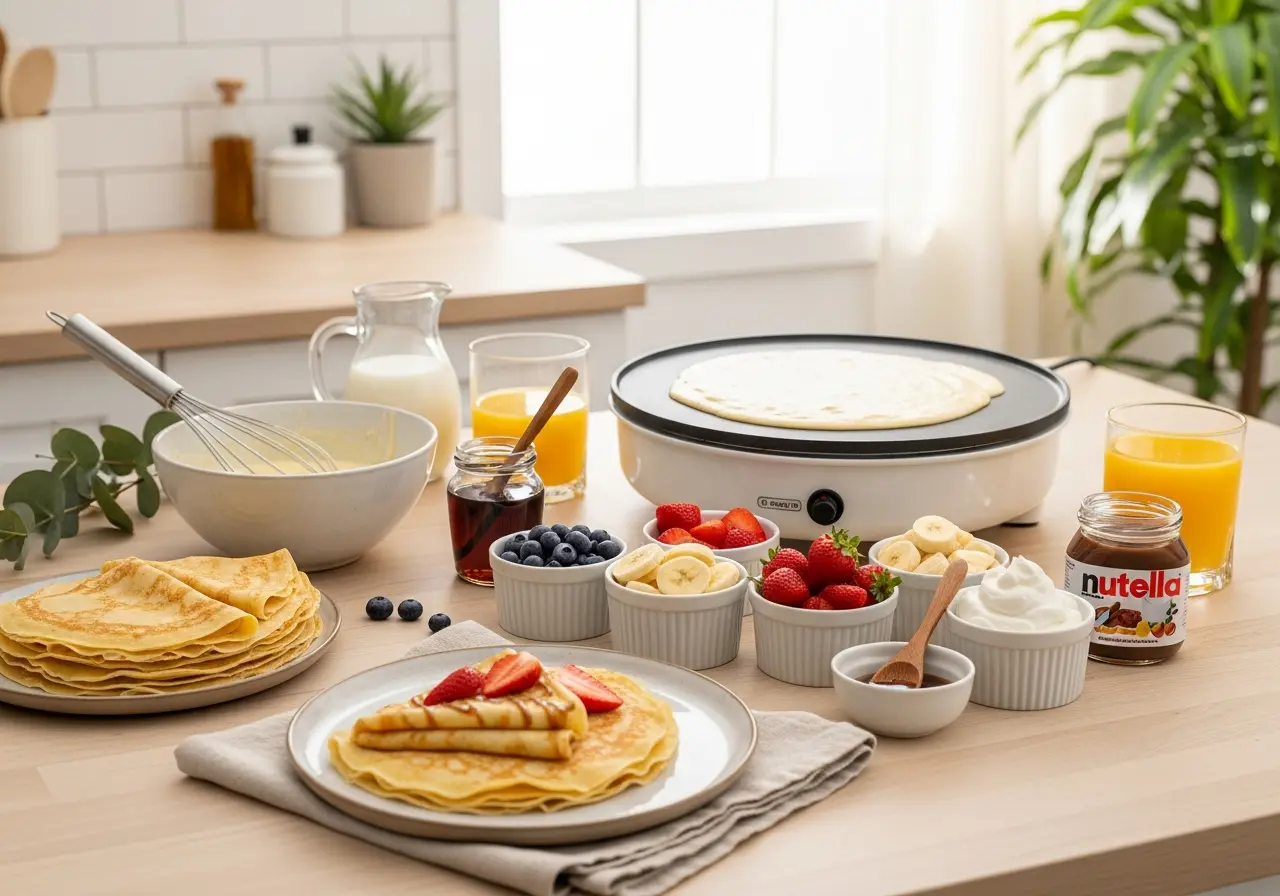
Setting Up an Inviting and Functional DIY Crepe Station Space
designing a crepe station with both aesthetics and efficiency ensures your guests can enjoy the experience seamlessly. Begin with a sturdy table draped in cheerful linens. Place a visibly warmed crepe pan or electric crepe maker at the center, with batter in a pitcher nearby for easy pouring. Arrange toppings and fillings in small bowls-group sweet and savory items separately-and provide spoons or mini tongs for hygiene. Don’t forget plates, napkins, and forks within easy reach.
Enhance the atmosphere with small details like fresh flowers, rustic wooden boards, or chalkboard labels for each topping. Good lighting highlights colorful ingredients, tempting everyone to customize their own masterpiece. Lastly, designate a clearing for assembling and eating to keep flow smooth and guests pleasant as they mingle.
Chef’s Notes and Tips for success
- Consistency is key: your crepe batter should be thin and fluid. If too thick, add a splash of milk; if too thin, sift in a little extra flour.
- Rest time matters: Never skip the batter resting period; it transforms your crepes from ordinary to irresistibly tender.
- Temperature control: Medium heat cooks crepes perfectly-too high and they’ll burn, too low and they’ll be rubbery.
- Make ahead: Batter can be prepared the night before and stored refrigerated. Likewise, crepes can be stacked and wrapped, then gently reheated on a skillet covered with foil.
- Use a non-stick pan: This negates the need for excess butter and results in evenly cooked, easy-to-flip crepes.
Serving Suggestions
Serve crepes warm, folded or rolled elegantly on a platter with a dusting of powdered sugar or a drizzle of your favorite syrup. Fresh herbs or edible flowers add an instant pop of color and refinement for savory options.For an added touch of indulgence, offer small jars of homemade jam, nut butters, or a bowl of Greek yogurt on the side.Watching your guests customize their own perfect crepes not only delights the palate but sparks conversation and joy.

| Nutritional Info (per crepe) | Calories | Protein | Carbs | Fat |
|---|---|---|---|---|
| Basic Crepe (without fillings) | 95 kcal | 4g | 12g | 3g |
| Filled with Nutella & Banana | 190 kcal | 5g | 28g | 6g |
| Savory Spinach & Goat Cheese | 150 kcal | 7g | 14g | 5g |
For more fun and inventive pancake variations, check out our Fluffy Pancake recipes Collection. To deepen your understanding of crepe-making techniques, visit Cuisinart’s Crepe Making Tips.
Q&A
Q&A: Create Your Own DIY Crepe Station – A Step-by-Step Guide
Q1: What is a DIY crepe station and why should I create one?
A: A DIY crepe station is a personalized setup where guests or family members can assemble their own crepes with a variety of fillings and toppings. It’s a fun, interactive way to enjoy a meal or dessert that encourages creativity and customization. Plus, it’s perfect for gatherings, brunches, or anytime you want to add a bit of culinary magic to your table!
Q2: What essential equipment do I need to set up a DIY crepe station?
A: Start with a non-stick crepe pan or griddle for easy crepe-making. You’ll also need a batter dispenser or ladle, a spreader (called a “rozell”), spatulas for flipping, and plates. Don’t forget small bowls or jars for your fillings and toppings, plus spoons or tongs for serving.
Q3: How do I prepare crepe batter for the station?
A: Crepe batter is simple and requires just a few ingredients: flour, eggs, milk, a pinch of salt, and melted butter. Whisk everything together until smooth,then let it rest in the fridge for about 30 minutes-this helps the batter spread more evenly.You can prepare it the night before for convenience.
Q4: What are some creative savory filling ideas for the crepe station?
A: Think beyond the usual! Consider sautéed mushrooms with garlic and herbs, fresh spinach with ricotta cheese, roasted veggies with a drizzle of pesto, or a medley of caramelized onions and goat cheese. Thes options offer vibrant flavors and textures that everyone will love.
Q5: What sweet toppings and fillings can I offer to make the crepe station irresistible?
A: Sweet delights could include fresh berries, sliced bananas, Nutella alternatives like almond butter or fruit preserves, whipped cream, powdered sugar, and even drizzles of honey or maple syrup.For a special touch,toss in some toasted nuts or edible flowers as garnish!
Q6: How do I keep the crepes warm and fresh during the event?
A: Use a warming tray or low-heat oven to keep your cooked crepes warm without drying them out. Stack them with parchment paper in between to prevent sticking. If you’re making them on-demand, set up the pan within reach and encourage your guests to assemble their crepes fresh.
Q7: Can kids participate in the DIY crepe station? How to make it kid-friendly?
A: Absolutely! Kids love building their own food. To make it safer and easier, pre-cook the crepes for them and offer mild fillings like fresh fruit slices, cream cheese, or honey. Use smaller serving utensils that kids can handle and keep hot pans away from their reach.
Q8: Any tips to make my DIY crepe station visually inviting?
A: Presentation is half the fun! Use colorful bowls or jars for fillings, arrange ingredients in neat clusters or rainbow order, and add small labels describing each option. A beautiful tablecloth and some fresh flowers or candles can set a warm, inviting mood to elevate the whole experience.
Q9: Can I accommodate dietary restrictions at my crepe station?
A: Definitely! Prepare gluten-free batter for those who need it or offer buckwheat flour for a conventional twist. Have dairy-free fillings like coconut yogurt or fruit compotes, and include plenty of fresh vegetables and plant-based proteins for everyone to enjoy.
Q10: How can I clean up efficiently after the crepe station fun is over?
A: Line your prep area with parchment or wax paper to catch drips and crumbs, making it easier to wipe down surfaces. Soak pans and utensils promptly to prevent batter from drying, and use dishwasher-safe bowls and tools if possible. Encourage guests to clear their plates to speed up tidying.
Enjoy building your own tasty, customizable crepe experience-one delicious creation at a time!
Future Outlook
Now that you’ve uncovered the simple steps to crafting your very own DIY crepe station, it’s time to channel your inner chef and bring this deliciously interactive experience to life. Whether it’s a cozy brunch with family or a festive gathering with friends, your custom crepe station will be the heart of the party-inviting everyone to mix, match, and savor each bite just the way they like it.So gather your ingredients, set up your space, and watch as your kitchen transforms into a crepe paradise, one golden, buttery circle at a time. Happy flipping!