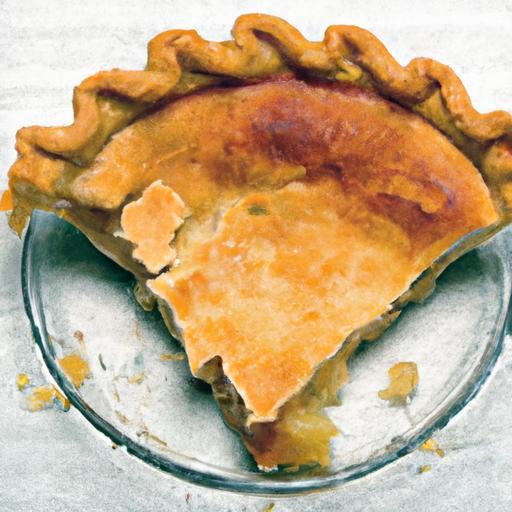
There’s somthing undeniably magical about a perfectly baked pie crust-the delicate crunch that gives way to tender, buttery layers, each bite a symphony of flaky goodness. But for those navigating the gluten-free world, achieving that quintessential texture and flavor often feels like an elusive art.
Fear not, pie lovers! “Flaky & Flavorful: Mastering the Gluten-Free Pie Crust” is here to unlock the secrets behind crafting crusts that don’t just survive without gluten-they thrive. From selecting the right flours to mastering mixing techniques and baking tips, this guide will transform your pie-making journey, ensuring every slice is a celebration of both taste and texture. Get ready to roll up your sleeves and create gluten-free crusts that impress even the most devoted pie connoisseurs.
Gluten-free flours are the cornerstone of any accomplished gluten-free pie crust,and understanding their distinct properties will empower you to craft a crust that is both flaky and full of flavor. Unlike conventional wheat flour, gluten-free blends lack the elastic protein network that holds dough together, which means the art of creating a tender, flaky crust depends heavily on choosing the right flour and mastering complementary techniques.
Prep and Cook Time
- Prep Time: 20 minutes
- Chill Time: 1 hour
- Cook Time: 25-30 minutes
Yield
1 double 9-inch pie crust (enough for one filled pie)
Difficulty Level
Medium - requires attention to detail and patience, but no specialized equipment.
Ingredients
- 1 ½ cups gluten-free all-purpose flour blend (with xanthan gum included)
- ½ cup almond flour (for richness and tender crumb)
- 1 tsp fine sea salt
- 1 tbsp granulated sugar (optional, balances flavor)
- 1 cup (2 sticks) unsalted cold butter, cut into small cubes
- 1 large egg, beaten
- 2-4 tbsp ice-cold water (adjust as needed)
Instructions
- Mix dry flours, salt, and sugar: In a large bowl, whisk together the gluten-free all-purpose flour, almond flour, salt, and sugar until evenly combined. The almond flour adds a tender, nutty texture that enriches the crust.
- Cut in the butter: Add chilled, cubed butter to the dry mixture. Using a pastry cutter or two forks, work the butter into the flours until the mixture resembles coarse, pea-sized crumbs. The key to flakiness is keeping the butter cold and unevenly distributed.
- Add egg and ice water: Stir in the beaten egg gently. Sprinkle the cold water,one tablespoon at a time,until the dough just starts to come together. Avoid overworking-stop when the dough forms moist clumps but isn’t sticky.
- Form the dough and chill: Gather the dough into two discs, wrap in plastic, and refrigerate for at least 1 hour. Chilling solidifies the fats and hydrates the flours, improving texture and manageability.
- Roll the dough gently: Lightly flour a surface with gluten-free flour. Roll one dough disc between two pieces of parchment paper to about 12 inches in diameter and approximately 1/8-inch thick. Rolling between parchment keeps the dough from sticking and tearing.
- Transfer and shape: Carefully lift the rolled dough using the parchment and place it into a 9-inch pie pan. press gently to fit the pan without stretching. Excess dough can be trimmed and rerolled.
- Chill again before baking: Place the pie crust in the refrigerator for another 20 minutes before filling or blind baking to prevent shrinkage and maintain its flaky texture.
- Bake as desired: Follow your pie filling recipe instructions. For blind baking, prick the dough with a fork and bake at 375°F (190°C) for 15-20 minutes until golden and crisp.
Chef’s Notes: Tips for Success with gluten-Free Pie Crust
- Choosing the right flours: A balanced blend of gluten-free all-purpose flour and almond flour creates a crust with great mouthfeel and structure. Avoid single flours like rice or coconut alone, which can lead to dryness or crumbling.
- Incorporating fats: Use cold, unsalted butter cut into cubes for those flaky layers. For added moisture and richness, a small proportion of almond flour or even mild-tasting vegetable shortening (if avoiding dairy) can improve tenderness.
- Hydration balance: Gluten-free dough can be tricky-add water slowly and avoid overmixing to keep your crust tender yet sturdy.
- handling and rolling: Keep dough and all tools cool to prevent butter from melting prematurely. Rolling between parchment also helps prevent sticking, tearing, and uneven thickness.
- Make ahead: Dough can be frozen for up to two weeks. Thaw overnight in the fridge and roll as usual for fresh results.
- Common pitfalls: If your crust cracks while rolling, patch gently with a dab of water and scraps; gluten-free dough is forgiving with a delicate touch.
Serving Suggestions
Present this gluten-free pie crust as a canvas for both sweet and savory fillings. For apple or berry pies, dust edges with coarse sugar before baking for a sparkling finish. For savory quiches, garnish with fresh herbs like rosemary or thyme after baking to complement the crumbly crust. Serve slices warm with a scoop of dairy-free vanilla ice cream or a dollop of whipped coconut cream for an indulgent experience.
| Nutrient | Per Serving (1/8 Pie) |
|---|---|
| Calories | 260 |
| Protein | 3g |
| Carbohydrates | 15g |
| Fat | 22g |

For more expert guidance on gluten-free baking, check out our complete Gluten-Free Baking Guide and expand your kitchen confidence. For detailed scientific insights on the role of gluten alternatives, explore this resource from the celiac Disease Foundation.
Q&A
Q&A: Flaky & Flavorful – Mastering the Gluten-Free Pie Crust
Q1: Why is making a flaky gluten-free pie crust more challenging than a traditional one?
Gluten is like the magical thread in wheat flour that holds dough together and creates elasticity. Without gluten, pie dough tends to be crumbly and less stretchy, which can make it tricky to achieve that perfect flaky texture. Gluten-free flours absorb moisture differently, and frequently enough lack the natural binding properties, so mastering the balance of fats, liquids, and flour blends is key to the ideal crust.
Q2: What types of gluten-free flours work best for pie crusts?
A mix of gluten-free flours usually performs better than a single flour. Common blends combine rice flour, tapioca starch, almond flour, and sometimes oat flour (certified gluten-free). These ingredients work in harmony-rice flour lends structure, tapioca starch adds chewiness and stretch, and almond flour contributes richness and flavor. The balance helps mimic the texture of traditional pie crust.
Q3: How do fats contribute to flakiness in gluten-free pie crusts?
Fats like cold butter or dairy-free alternatives coat the flour particles, preventing too much hydration and creating pockets that turn into flaky layers during baking. In gluten-free crusts, using plenty of cold fat and handling the dough gently helps replicate the tender, flaky bite that pie lovers crave.
Q4: Can you recommend a tip for handling gluten-free pie dough without it falling apart?
Absolutely! Keeping your dough cold is vital. Chill all your ingredients beforehand, and avoid overworking the dough. use just enough liquid to bring the dough together-it should feel slightly crumbly but hold when pressed. If it’s too dry, a teaspoon of ice water at a time can help; too wet, sprinkle a bit more flour.Resting the dough in the fridge before rolling out improves moisture distribution and helps prevent cracking.
Q5: How do you roll out gluten-free pie dough without it sticking or breaking?
Dust your work surface and rolling pin with gluten-free flour or even a light sprinkle of cornstarch. Rolling the dough between two sheets of parchment paper can be a game-changer-no sticking, no need to add extra flour, and easy transfer into the pie dish. If cracks form, gently press the dough back together with your fingers or patch tears with a little extra dough.
Q6: What role does chilling the pie crust before baking play in the final product?
Chilling firms up the fat again after rolling, which is essential for flakiness. It also relaxes any tension in the dough, reducing shrinkage.For gluten-free crusts, this step is even more crucial because the dough is more delicate. A good chill-usually at least 30 minutes-sets the structure so the crust holds its shape and shatters with that satisfying flake when sliced.
Q7: Are there any secret ingredients to enhance flavor without compromising texture?
Yes! A pinch of xanthan gum or psyllium husk powder can boost elasticity and hold moisture without weighing down the dough. For flavor, a touch of sugar or a sprinkle of fine sea salt enriches the crust’s profile.Some bakers add a splash of apple cider vinegar or lemon juice to slightly tenderize the dough and brighten flavors.
Q8: How can you prevent a gluten-free pie crust from becoming too dry or crumbly after baking?
Avoid overbaking-check your crust about 5-10 minutes before the recipe’s suggested time. Using a bit more fat or incorporating moist filling ingredients helps keep the crust tender. Also, make sure your filling isn’t leaking excessive moisture, which can make the crust soggy or crumbly in spots. blind baking with pie weights creates a sturdy base, especially for custard or cream pies.
Q9: What’s the best way to store leftover gluten-free pie crust or baked pies?
Unbaked dough can be tightly wrapped and refrigerated for up to 3 days or frozen for up to a month. Baked pies should cool completely before covering loosely with foil or plastic wrap to prevent moisture buildup-and stored in the refrigerator. Reheat gently to restore some flakiness and warmth.
Q10: Can mastering the gluten-free pie crust expand my baking repertoire beyond pies?
Definitely! Once you’re comfortable with gluten-free doughs, you can branch into tarts, quiches, turnovers, and savory galettes. The key skills-balancing moisture, fat, and flour blends-open up a whole new world of texture and flavor that can delight both gluten-free eaters and traditional pie lovers alike.
In Retrospect
As you close the chapter on gluten-free pie crusts, remember that mastering this delicate balance of flakiness and flavor is as much an art as it is a science.With the right ingredients, techniques, and a dash of patience, you can create crusts that not only hold your fillings beautifully but also delight every palate-gluten-sensitive or not. So go ahead, roll up your sleeves, embrace the quirks of gluten-free baking, and watch as your pies become the star of every table, flaky layers and all. Your journey to pie perfection starts now, one buttery, golden bite at a time.