There’s something undeniably satisfying about a perfectly roasted chicken-its golden, crispy skin glistening under the kitchen lights, the savory aroma wafting through the air, promising a feast to come. But beyond the roasting lies an art often overlooked: the carving.
Mastering the art of carved roast chicken transforms a simple meal into a culinary experience, revealing tender, juicy meat with every precise cut. Weather you’re preparing for a family dinner or aiming to impress guests, understanding the tips and techniques of carving can elevate your presentation and enjoyment. In this article, we’ll guide you step-by-step through the secrets of carving roast chicken like a pro, turning an everyday dish into an elegant centerpiece.
Mastering the art of carved roast chicken begins with selecting the right bird and understanding the techniques that transform a simple roast into a masterpiece of flavor and presentation. Whether its a family Sunday feast or an elegant dinner party, choosing the perfect roast chicken for effortless carving is the foundation of a memorable meal that delights both the eyes and palate.
Prep and cook Time
- Preparation: 15 minutes
- Marinating (optional): 2 to 4 hours
- Roasting: 1 hour 15 minutes to 1 hour 30 minutes (depending on weight)
- Resting: 15 minutes
Yield
Serves 4 to 6 people
Difficulty Level
Medium – Perfect for home cooks ready to elevate thier carving and presentation skills
Ingredients
- 1 whole chicken, 4 to 5 pounds, preferably organic or free-range for deeper flavor
- 3 tbsp olive oil or melted unsalted butter
- 1 lemon, halved
- 4 garlic cloves, smashed
- 1 tbsp sea salt
- 1 tsp freshly ground black pepper
- 2 tsp dried thyme or a handful of fresh sprigs
- 1 tsp smoked paprika (optional, for color and subtle warmth)
- Fresh herbs for garnish: rosemary, thyme, and parsley
Instructions
- Prepare the chicken: Remove the giblets and pat the chicken dry inside and out with paper towels. This promotes crisp skin. Rub the entire bird with olive oil or melted butter, then season generously with salt, pepper, thyme, and smoked paprika.
- Stuff aromatics: Place lemon halves and garlic cloves inside the cavity. This infuses the chicken with subtle citrus and garlic flavor during roasting.
- Truss the chicken: Tie the legs together with kitchen twine and tuck the wing tips under the body to ensure even cooking.
- Roast the chicken: Preheat your oven to 425°F (220°C). Place the chicken breast-side up on a rack in a roasting pan. Roast for 15 minutes at high heat to get crisp skin, then reduce the oven temperature to 375°F (190°C) and continue cooking for approximately 1 hour or until the internal temperature at the thickest part of the thigh reaches 165°F (74°C).
- rest your roast: Once out of the oven, let the chicken rest uncovered for at least 15 minutes on a carving board. Resting allows the juices to redistribute and the meat to finish cooking gently, yielding tender, juicy slices.
- Carve with precision: Using a sharp carving knife and a fork, start by removing the legs and thighs by slicing at the joint. Next, remove the wings. For the breast, carve thin, even slices against the grain to maximize tenderness. Use smooth, purposeful strokes to avoid shredding the meat.
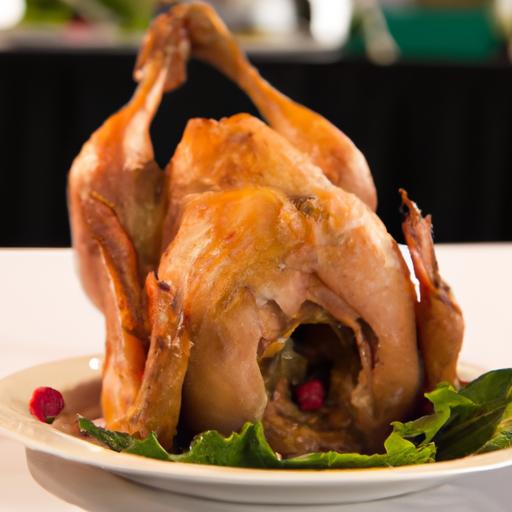
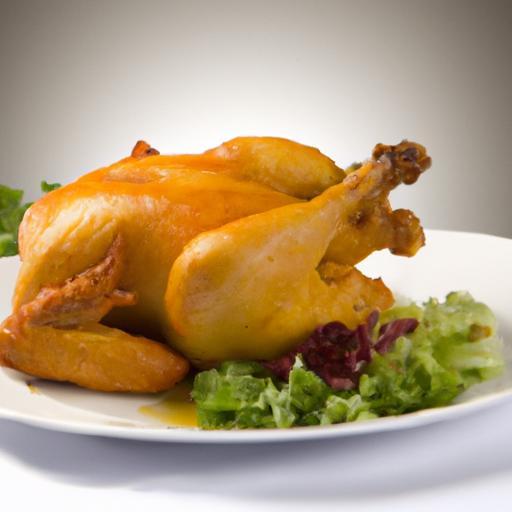
- Present beautifully: arrange the carved pieces on a warmed platter. Garnish with sprigs of fresh herbs and scatter some lemon slices around for luminous pops of color.
Essential Tools and Techniques for Precision Slicing
Invest in a sharp carving knife with a long, thin blade designed for delicate slicing. A sturdy carving fork helps hold the chicken steady while you carve. begin by identifying the natural joints and use them as guides to effortlessly separate the legs and wings. When slicing the breast meat, aim for uniform thickness, about ¼ inch thick, to maintain even cooking and a beautiful texture. wiping your knife clean between cuts prevents tearing and keeps each slice pristine.
Unlocking flavor and Texture Through Proper Resting and Cutting
Never rush the resting phase. Resting allows the juices to settle,transforming your roast chicken from simply cooked to exceptional. Cutting immediately after roasting releases those precious juices onto the plate, leaving dry meat. Proper carving-against the grain-ensures each bite is tender, highlighting the bird’s natural moisture and rich flavors.
Presentation Tips to Elevate Your Carved Roast Chicken on the Plate
Create a captivating presentation by layering the cuts in an inviting arrangement. Place the white breast meat in slightly overlapping slices in the center, surround with legs and thighs, and intersperse with bright lemon wedges and fresh herb clusters. A drizzle of the pan juices or a light herb-infused olive oil adds shine and aroma. Use a rustic wooden board or a classic white platter – the contrast will make the golden skin and succulent meat pop visually.
Tips for Success
- Choose quality: Opt for free-range or organic chickens for superior flavor and texture.
- keep tools sharp: A dull knife can crush meat and make carving frustrating.
- Room temperature chicken: Let your bird sit out 20 minutes before roasting to help it cook evenly.
- use a meat thermometer: Avoid guesswork by confirming the chicken’s internal temperature to achieve safety and perfection.
- save the carcass: Make flavorful homemade chicken stock with leftover bones.
Serving Suggestions
Pair your carved roast chicken with a vibrant medley of roasted seasonal vegetables, creamy mashed potatoes, or a crisp green salad tossed with lemon vinaigrette. A small bowl of tangy, homemade chimichurri or garlic herb sauce can add a delightful burst of flavor. Sprinkle freshly chopped parsley or thyme leaves over the dish just before serving to uplift the aroma and visual appeal.

| Nutrient | Amount per Serving |
|---|---|
| Calories | 320 kcal |
| Protein | 38 g |
| Carbohydrates | 0 g |
| Fat | 17 g |
For more tips on roasting poultry and carving techniques, check out our Complete Guide to Roasting Poultry. To explore the science behind meat resting, Serious Eats offers an expert breakdown that every cook should know.
Q&A
Q&A: Mastering the Art of Carved Roast chicken – Tips & Techniques
Q1: What’s the secret to carving a roast chicken like a pro?
A1: the secret lies in patience and precision. Allow the chicken to rest for at least 15 minutes after roasting-this locks in the juices. Use a sharp carving knife and start by removing the legs and thighs, then slice the breast meat thinly against the grain. Keeping your cuts clean and confident ensures each piece looks as delicious as it tastes.
Q2: How can I keep the carved chicken moist and flavorful?
A2: Resting is your best freind. After roasting, let the bird sit uncovered or lightly tented with foil. This helps redistribute the juices. When carving, slice just before serving and consider spooning a bit of pan jus or a flavored butter over the slices to enhance moisture and flavor.
Q3: What tools are essential for carving a roast chicken effortlessly?
A3: A sharp chef’s knife or carving knife is non-negotiable,along with a sturdy carving fork to steady the bird. Some chefs swear by a boning knife for intricate cuts around the joints.Additionally, a wooden or plastic cutting board dedicated to carving will keep everything neat and safe.
Q4: Are there any tips for carving a particularly crispy-skinned chicken?
A4: Yes! Skins that are crackling and crisp can sometimes stick to the knife. To prevent tearing, make sure your blade is razor-sharp, and use gentle, deliberate strokes rather of pressing down hard. Carving in smooth layers rather than sudden cuts keeps that gorgeous skin intact.
Q5: Can I carve the chicken ahead of time without losing its appeal?
A5: While fresh carving is ideal, you can carve and store the meat properly to save time. Slice the chicken and arrange pieces in an airtight container,adding a little cooking broth or drippings to keep them moist. Chill and reheat gently without drying them out.This method keeps flavor vibrant, perfect for busy days.
Q6: How do I identify the best places to cut when carving a roast chicken?
A6: Look for natural joints-the spots where the leg meets the body or the wing attaches to the breast. These are designed to separate easily.Gently wiggle the limbs to find loose joints,and use your knife to cut through the connective tissue rather than hacking through bone.
Q7: What’s the best way to present carved roast chicken on a platter?
A7: Arrange the dark meat pieces-legs and thighs-on one side, and the sliced breast meat fanned out on the other. Garnish with fresh herbs like rosemary or thyme for color and aroma. A drizzle of pan sauce or a sprinkle of flaky salt finishes the look, inviting guests to dig in.
Q8: Are there carving techniques that can definitely help me serve different portion sizes?
A8: Absolutely! For larger appetites, offer whole legs or sizable breast slices. For lighter portions or appetizers, carve the breast into thinner slices and cut the leg meat off the bone for easy bites. Learning to adjust your cuts to the occasion elevates your hosting game.
Q9: How can I avoid common mistakes when carving roast chicken?
A9: Avoid carving straight out of the oven when the juices are still moving rapidly-it leads to dry meat. Don’t saw back and forth; instead, use smooth slicing motions. Lastly, resist the urge to hog the largest piece early on-carving evenly ensures everyone enjoys their share.
Q10: Can mastering carved roast chicken enhance other cooking skills?
A10: Definitely! Carving teaches you to understand the bird’s anatomy, improves knife skills, and encourages mindful cooking.These lessons translate easily to other poultry, game birds, and even larger cuts of meat-turning you into a versatile and confident home chef.
In Retrospect
As you close the chapter on mastering the art of carved roast chicken, remember that each slice tells a story of patience, precision, and passion. With the tips and techniques shared, you’re no longer just serving a meal-you’re presenting a masterpiece.So, embrace your carving knife as an extension of your culinary creativity, and let every cut reveal the juicy, tender heart of your roast. here’s to turning simple poultry into an unforgettable centerpiece, one perfect carve at a time.