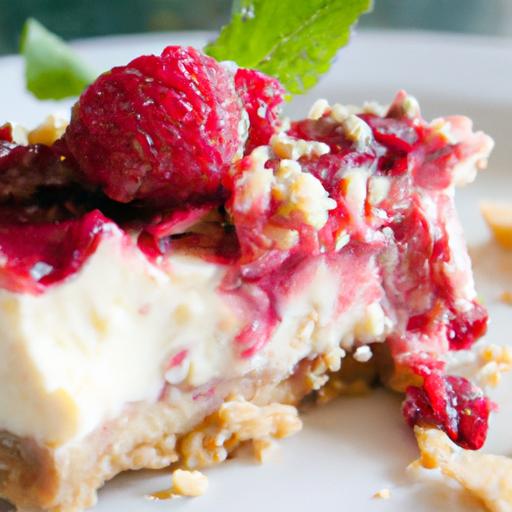
ThereS something truly magical about the combination of rich,creamy cheesecake and the bright,tart burst of fresh raspberries. Now, imagine that luscious pairing transformed into convenient, handheld bars-each bite delivering a perfect balance of sweetness and tang.
Welcome to the world of delicious raspberry cheesecake bars with a gluten-free crust, where indulgence meets mindful eating. Whether you’re catering to gluten sensitivities or simply craving a wholesome dessert that doesn’t skimp on flavor, these bars offer the best of both worlds.Join us as we dive into how to create this irresistible treat, blending buttery gluten-free crust with velvety cheesecake and jewel-like raspberry swirls. Its dessert reimagined, ready to brighten your next gathering or satisfy a midweek sweet tooth in the healthiest way possible.
Delicious Raspberry Cheesecake Bars with Gluten-Free Crust combine a luscious, creamy filling with a perfectly crisp, nutty base that celebrates the vibrant tartness of fresh raspberries.Whether you’re accommodating dietary preferences or simply craving a dessert that bursts with flavor and texture, these cheesecake bars capture the essence of a refined treat that’s surprisingly easy to achieve at home. This recipe is a tribute to the balance of sweetness and tang, crafted with a thoughtful gluten-free crust that ensures every bite is flawlessly crumbly without sacrificing structure.
Prep and Cook time
- Planning: 20 minutes
- Baking: 50 minutes
- Cooling and Chilling: 4 hours (preferably overnight)
Yield
12 decadent bars, perfect for sharing or indulgent snacking.
Difficulty Level
Medium – This recipe strikes a balance between straightforward steps and rewarding techniques for an ideal cheesecake texture.
Ingredients
- For the Gluten-Free Crust:
- 1 ½ cups gluten-free almond flour
- ½ cup finely ground gluten-free oat flour
- ¼ cup coconut sugar
- ¼ teaspoon fine sea salt
- 6 tablespoons unsalted butter, melted
- For the Cheesecake Filling:
- 16 oz cream cheese, softened
- ⅔ cup granulated sugar
- 2 large eggs, at room temperature
- 1 teaspoon pure vanilla extract
- ½ cup full-fat Greek yogurt
- 1 tablespoon gluten-free cornstarch
- For the Raspberry Swirl:
- 1 cup fresh raspberries, plus extra for garnish
- 2 tablespoons sugar
- 1 teaspoon lemon juice
Instructions
- Prepare the crust: Preheat your oven to 350°F (175°C). In a mixing bowl, combine the gluten-free almond flour, gluten-free oat flour, coconut sugar, and salt. Stir in the melted butter until the mixture clumps together evenly. Press this mixture firmly into a greased or parchment-lined 9×9-inch baking pan, focusing on creating an even layer to support the filling.
- Bake the crust: Bake for 12 minutes or until the edges turn a subtle golden brown. Remove from the oven and allow it to cool completely. This pre-bake step guarantees a crisp base that won’t get soggy under the creamy filling.
- Create the raspberry puree: While the crust cools, place fresh raspberries, sugar, and lemon juice in a saucepan over medium heat. stir gently as the berries break down, cooking for about 5 minutes until you have a thickened, vibrant puree. Strain through a fine mesh sieve to remove seeds and set aside to cool.
- Mix the cheesecake filling: In a large bowl, beat softened cream cheese and sugar until smooth and silky. add eggs one at a time, mixing well after each addition. Stir in vanilla, Greek yogurt, and cornstarch until fully incorporated-this ensures the perfect creamy, dreamy texture with just the right firmness.
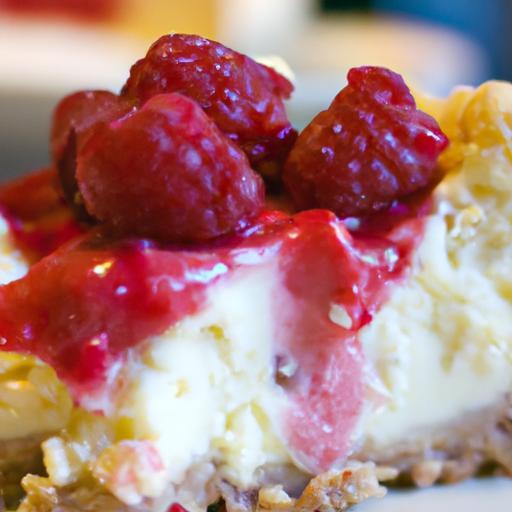
- Assemble the bars: Pour half of the cheesecake filling over the cooled crust, spreading evenly. Dollop half of the raspberry puree over the top and use a skewer or knife to create a lovely swirl pattern. Repeat with the remaining filling and raspberry puree, swirling gently to maintain the distinct marbled effect.
- Bake the cheesecake bars: Bake at 325°F (165°C) for 45-50 minutes until the edges are set but the center still jiggles slightly-this ensures a creamy middle. Turn off the oven and leave bars inside with the door slightly ajar for 15 minutes to prevent cracking.
- Chill thoroughly: Allow the cheesecake bars to cool to room temperature, then refrigerate for at least 4 hours, preferably overnight. This chilling time locks in the flavors and perfects the texture.
- Serve with flair: cut into bars and garnish with fresh raspberries and a light dusting of powdered sugar or chopped toasted almonds for extra texture. Enjoy chilled for the ultimate dessert experience.
Tips for Success
- Room temperature ingredients: Ensuring the cream cheese and eggs are at room temperature helps create a smooth, lump-free filling.
- Don’t overmix: Overbeating can incorporate too much air, leading to cracks-gentle folding and mixing are key.
- Use fresh raspberries: Their natural tartness balances the sweetness in the bars beautifully and contributes to the refreshing character.
- Make ahead: These bars improve with time and can be stored in the fridge for up to 5 days or frozen wrapped tightly for up to 3 months.
- Customizing flours: Feel free to swap oat flour for brown rice flour if preferred, maintaining the gluten-free integrity while adjusting textures slightly.
Serving Suggestions
Present the bars chilled and slightly dusted with organic powdered sugar for a delicate shimmer. Pair them with a dollop of whipped coconut cream or a scoop of vanilla bean ice cream to elevate the luscious texture contrast. Garnish plates with fresh mint leaves and a few extra raspberries for vibrant color and a refreshing aroma. These cheesecake bars are ideal for celebrations,afternoon teas,or as a charming end to a summer dinner party.

| Nutritional Info (per serving) | Calories | Protein | Carbs | Fat |
|---|---|---|---|---|
| Each Bar | 320 kcal | 7 g | 22 g | 23 g |
For more inspiring gluten-free desserts that pair perfectly with these bars, explore our Gluten-Free Dessert Collection. Learn about the science behind cheesecake texture from Serious Eats.
Q&A
Q&A: delicious Raspberry Cheesecake Bars with gluten-Free Crust
Q1: What makes these raspberry cheesecake bars diffrent from traditional cheesecake bars?
A1: These bars stand out because of their luscious raspberry swirl and a gluten-free crust that ensures everyone can indulge without worry. Instead of a typical graham cracker base, we use a blend of almond flour and gluten-free oats, offering a nutty, slightly crisp foundation that complements the creamy filling perfectly.
Q2: Can I use frozen raspberries for the raspberry layer?
A2: Absolutely! Frozen raspberries work wonderfully and actually make it easier to create that beautiful, homemade swirl. Just thaw and drain them slightly to avoid extra moisture,then mash or blend to your preferred consistency.Fresh raspberries are fantastic too if you have them on hand.
Q3: is the crust crunchy or soft?
A3: the gluten-free crust strikes a perfect balance: it’s delectably tender with a subtle crunch. Thanks to the almond flour and gluten-free oats, it provides a rustic, wholesome texture that holds together well but isn’t overly hard-exactly what you want beneath a rich cheesecake layer.
Q4: How can I ensure the cheesecake layer is silky smooth and not grainy?
A4: The secret is to use full-fat cream cheese at room temperature and beat it thoroughly with the sugar until creamy before adding eggs and other ingredients. Avoid overmixing after adding the eggs to prevent incorporating too much air,which can cause cracks or a grainy texture.
Q5: Can I make these bars dairy-free as well?
A5: for a dairy-free version, substitute the cream cheese with a high-quality dairy-free cream cheese alternative and use coconut cream or another plant-based cream for richness. Keep in mind that the texture might be slightly different, but with careful blending, these bars can still be wonderfully creamy and satisfying.
Q6: What’s the best way to store these cheesecake bars?
A6: Store them in an airtight container in the refrigerator for up to five days.Because of their dense yet creamy texture, they keep their flavor and moisture beautifully. They can also be frozen for up to a month-just thaw overnight in the fridge before serving.
Q7: Are these bars suitable for making ahead for a party or special occasion?
A7: Definitely! They actually benefit from sitting overnight, as the flavors deepen and the texture firms up perfectly. Prepare them a day ahead, give them ample chilling time, and slice just before your guests arrive for an impressive and effortless dessert.
Q8: How can I add a bit of extra flair or flavor without overpowering the raspberry?
A8: Try adding a hint of lemon zest to the cheesecake layer to brighten the flavors or sprinkle some toasted coconut flakes on top before serving for a subtle crunch.Another idea is to gently fold some finely chopped white chocolate into the cheesecake mixture for a mild sweetness that pairs beautifully with raspberry.
Q9: Are these bars suitable for people with nut allergies?
A9: Since the crust uses almond flour, they’re not recommended for those with nut allergies. however, you can experiment with a gluten-free oat flour crust or a blend of gluten-free breadcrumbs and seeds like sunflower or pumpkin to create a nut-free, still delicious alternative.
Q10: What kitchen tools do I need to make these bars?
A10: The essentials include a mixing bowl, electric hand mixer or stand mixer, a rubber spatula, an 8×8-inch baking pan, parchment paper (for easy removal), and either a blender or fork to mash the raspberries. A sharp knife is useful for clean slicing once the bars are chilled.
Embark on your next baking adventure with these vibrant, luscious raspberry cheesecake bars that marry the indulgence of dessert with the wholesome goodness of a gluten-free crust. Perfect for sharing or savoring solo!
Insights and Conclusions
Whether you’re hosting a gathering or simply craving a sweet treat, these delicious raspberry cheesecake bars with a gluten-free crust offer the perfect balance of tangy fruitiness and creamy richness-all without the gluten. Easy to make and irresistibly satisfying, they prove that dietary restrictions don’t mean sacrificing flavor. So next time you want a dessert that’s both beautiful and deliciously inclusive, reach for this recipe and enjoy every luscious, guilt-free bite. Happy baking!