In the world of patisserie, few confections captivate the eye and palate quite like the gâteau damier, or checkerboard cake. This visually striking dessert, with its precise alternating squares of light and dark cake, transforms a simple treat into an edible work of art. Mastering the gâteau damier requires more than just baking skill-it demands patience, precision, and a touch of creative flair. In this article, we will delve into the origins of this elegant cake, explore the techniques behind its distinctive pattern, and offer expert tips to help you create your own stunning checkerboard masterpiece. Whether you are a seasoned baker or an adventurous novice, prepare to elevate your baking artistry with the timeless allure of gâteau damier.
The Art of Gâteau Damier: Mastering the Checkerboard Cake opens the door to one of pâtisserie’s most visually stunning creations, a true masterpiece where culinary precision meets artistic flair. Originating from the elegant patisseries of France, the Gâteau Damier (literally “checkerboard cake”) delights both the eye and the palate with its intricate alternating squares of chocolate and vanilla sponge. This iconic French cake transcends mere dessert, symbolizing celebration, craftsmanship, and the joy of meticulous baking brought to life through flavor harmony and visual symmetry.
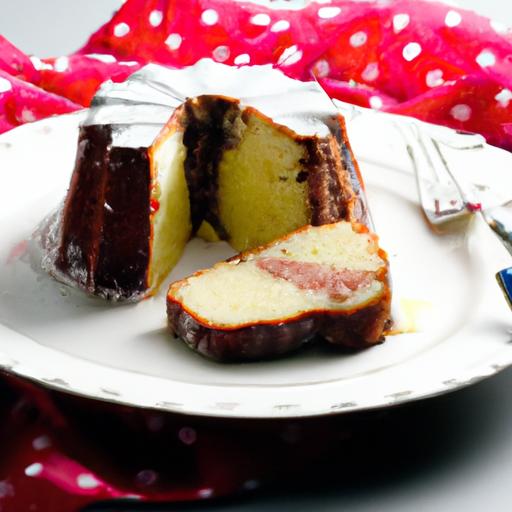
My first encounter with the Gâteau Damier was at a quaint Parisian bakery tucked away on a cobblestone street, where the delicate layers and the perfect checkerboard design sparked a interest that soon became a passionate pursuit. Each slice reveals the checkerboard’s enchanting pattern-a feast for both the senses and the soul. Mastering this cake invites you into a world of careful measurement, layering, and assembly that will elevate your baking skills to new heights.
Prep and Cook Time
- Preparation: 45 minutes
- Baking: 30 minutes per cake layer (two layers total)
- Assembly and Chilling: 1 hour
- Total Time: Approximately 3 hours
Yield
Serves 10-12 elegantly sized slices, perfect for gatherings or special occasions.
difficulty Level
Advanced – ideal for confident bakers ready to tackle precision and aesthetics.
Ingredients
- For the vanilla sponge:
- 1 cup all-purpose flour, sifted
- 3 large eggs, at room temperature
- ¾ cup granulated sugar
- ⅓ cup unsalted butter, melted and cooled
- ¼ cup whole milk
- 1 tsp pure vanilla extract
- ½ tsp baking powder
- Pinch of fine sea salt
- For the chocolate sponge:
- 1 cup all-purpose flour, sifted
- 3 large eggs, at room temperature
- ½ cup unsweetened cocoa powder, sifted
- ¾ cup granulated sugar
- ⅓ cup unsalted butter, melted and cooled
- ¼ cup whole milk
- 1 tsp pure vanilla extract
- ½ tsp baking powder
- Pinch of fine sea salt
- For the filling and frosting:
- 1¼ cups unsalted butter, softened
- 4 cups powdered sugar, sifted
- 2 tsp pure vanilla extract
- 3-4 tbsp whole milk
- 2 tbsp unsweetened cocoa powder (optional for chocolate frosting portion)
Instructions
- Prepare the vanilla sponge batter: In a large bowl, beat the eggs and sugar using a hand mixer on medium-high speed until pale and tripled in volume, about 5 minutes. Gently fold in the sifted flour, baking powder, and salt. Slowly incorporate the melted butter, milk, and vanilla extract until smooth. Avoid overmixing to keep the batter light.
- Prepare the chocolate sponge batter: Repeat the same method as the vanilla sponge, folding in the cocoa powder along with the dry ingredients.
- Bake the cakes: Pour vanilla batter into a greased and parchment-lined 9-inch round cake pan. Repeat for the chocolate batter in a separate pan. bake each at 350°F (175°C) for 30 minutes or until a toothpick inserted comes out clean. Cool completely on wire racks.
- Create the checkerboard rings: Using concentric circle cutters or a custom template, slice each layer horizontally into 3 rings (smallest to largest). Cut the vanilla and chocolate rings alternately and carefully swap their order to form the checkerboard pattern when stacked.
- Make the vanilla buttercream: Beat the softened butter until creamy. Gradually add powdered sugar, vanilla extract, and milk until light and fluffy. Reserve ⅓ of this frosting and blend it with cocoa powder to create a chocolate buttercream variant.
- Assemble the cake: Spread a thin layer of vanilla or chocolate buttercream between each alternating ring. Stack rings precisely, ensuring edges align perfectly. Apply a crumb coat around the entire cake and chill for 30 minutes.
- Finish frosting: Apply a final layer of buttercream evenly over the cake. Smooth with an offset spatula or bench scraper. Chill again to set the frosting before serving.
Tips for Success
- Precision is paramount: Use calibrated measuring tools and contour cutters to create perfect geometric layers.
- Room temperature ingredients: Ensure eggs and butter are at room temperature to help batter emulsify and cake layers remain tender.
- Cooling the sponge: Let cakes cool completely before slicing to prevent crumbling.
- Make-ahead: Bake the sponge layers a day in advance and wrap tightly. Assemble the cake on the day of serving for best freshness.
- Substitutions: For a dairy-free version,substitute butter with vegan margarine and use plant-based milk but keep fat content consistent.
- Troubleshooting: If batter slackens while folding,a brief chill in the refrigerator will help firm it before baking.
Serving Suggestions
Slice to reveal the breathtaking checkered pattern and plate alongside a dollop of freshly whipped cream or lightly sweetened crème fraîche. Garnish with fresh raspberries or edible flowers to add bursts of color. Pair each slice with a fragrant cup of Earl Grey tea or rich, dark coffee for a refined dessert experience that embraces tradition and craftsmanship.
| Nutrition (per slice) | Calories | Protein | Carbs | Fat |
|---|---|---|---|---|
| Gâteau Damier | 420 kcal | 5 g | 55 g | 18 g |
Discover more about making the perfect French buttercream to elevate your Gâteau Damier frosting technique.
For further history and culinary insights into French patisserie,visit Le Cordon Bleu, a world-renowned authority on classic French baking traditions.

Q&A
Q&A: The Art of Gâteau Damier – Mastering the Checkerboard Cake
Q1: What is a Gâteau Damier and why is it so visually striking?
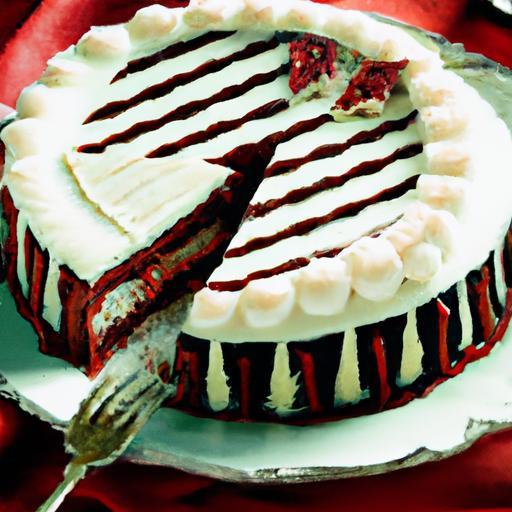
A1: Gâteau Damier, also known as the checkerboard cake, is a stunning dessert characterized by its alternating light and dark square patterns that resemble a chessboard or checkerboard inside.Its appeal lies in the surprise element-the cake looks ordinary from the outside, but slicing into it reveals a perfectly precise, mesmerizing grid of contrasting colors and flavors. this visual artistry transforms a simple cake into a showstopper centerpiece at any gathering.
Q2: what are the essential components to create the classic checkerboard design?
A2: At its core, the checkerboard pattern is made by layering and cutting two differently colored batters-typically vanilla and chocolate. The key ingredients include basic cake staples like flour, sugar, eggs, butter, and cocoa powder for the chocolate portion. Precision in batter preparation,piping,or shaping tools is essential to form neat rings or squares that create the checkerboard effect when the layers are stacked and assembled.
Q3: which cake flavors work best for a Gâteau Damier?
A3: While the traditional duo is vanilla and chocolate for a timeless contrast in both taste and color, creativity is welcomed! Other popular combinations include matcha green tea and vanilla, strawberry and almond, or even coffee and caramel flavors.The crucial factor is maintaining a strong contrast in color and complementary flavors that enhance each other without overpowering the delicate balance.
Q4: What is the secret technique to achieve clean, sharp squares inside the cake?
A4: the magic lies in patience and precision. bakers frequently enough use a ring mold divided into concentric circles or employ special checkerboard cake rings to pipe alternating layers of batter. After baking, the rings are carefully trimmed into equal strips. By alternating light and dark strips in a strategic order when assembling the cake layers, you create the iconic checkerboard pattern. consistency in thickness and even baking are key to prevent distortion.
Q5: Can the Gâteau Damier be made in advance, and how should it be stored?
A5: Absolutely! Gâteau Damier actually benefits from a few hours of chilling, which helps the layers set and the buttercream or filling firm up, making slicing cleaner and the squares more defined. Once cooled and frosted, the cake should be stored in an airtight container in the refrigerator and consumed within 3-4 days. For longer storage, it can be frozen tightly wrapped and thawed overnight in the fridge before serving.
Q6: What decorating styles complement the Gâteau Damier’s classic charm?
A6: Since the cake’s inner checkerboard is the hero, the exterior frosting often plays a supporting role with smooth, understated finishes like silky buttercream, whipped cream, or ganache. Elegant piping around the edges or delicate edible decorations such as fresh berries, gold leaf, or spun sugar can add flair without overpowering the visual surprise inside.
Q7: How can beginners confidently approach baking their first Gâteau Damier?
A7: Start simple! Use proven recipes for the base cakes and focus on mastering batter consistency. Invest in checkerboard cake rings or printable templates for guidance. Taking time to chill layers before cutting helps maintain sharp edges. Watch tutorial videos for visual cues and allow for practice runs-you don’t need to get it perfect the first time! With patience, your skills and confidence will rise with every cake sliced.
Q8: what makes the Gâteau Damier a timeless piece of edible art?
A8: Its enduring charm lies in the joyful blend of surprising design, harmonious flavors, and the technical creativity it demands.The checkerboard is not just a cake; it’s a playful interplay of precision and artistry that honors tradition while inviting endless innovation. Sharing a slice is like presenting a puzzle solved with sweet success-a true feast for both eyes and palate.
The Way Forward
As the final slice of a gâteau damier reveals its mesmerizing checkerboard pattern, it’s clear that this cake is more than just a dessert-it’s a celebration of craftsmanship and creativity. mastering the art of the checkerboard cake invites bakers to blend precision with imagination, transforming simple ingredients into a captivating visual and culinary experience.Whether you’re a seasoned patissier or an excited home baker, embracing the techniques behind the gâteau damier opens a doorway to endless possibilities, one beautifully layered square at a time. So, next time you crave something spectacular, remember: behind every perfect checkerboard lies a story of patience, skill, and a touch of edible magic.