There’s something undeniably magical about the warm, golden crust and pillowy softness of a freshly baked soft pretzel. Whether enjoyed as a savory snack with mustard,dipped in cheese,or simply savored plain,soft pretzels have a global appeal that transcends age and occasion. In “Twist & Taste: The Ultimate Guide to homemade Soft Pretzels,” we invite you to embark on a delicious journey where tradition meets creativity. From mastering the perfect dough to achieving that iconic glossy finish, this guide will equip you with everything you need to craft irresistible pretzels right in your own kitchen. Get ready to twist, bake, and taste your way to snacktime perfection!
Crafting soft, chewy pretzels at home sparks a beautiful blend of tradition and culinary science that anyone can master. Rooted in centuries-old baking rituals yet perfectly suited to modern kitchens, these irresistible pretzels bring warmth, texture, and that signature golden crust to your countertop.The journey begins with the perfect dough-rich with all-purpose flour and enlivened by yeast-that promises tenderness and that iconic chewiness with every twist.
Prep and Cook Time
- Planning: 25 minutes (plus 1 hour for dough rising)
- Cooking: 12 minutes
- Total Time: Approximately 1 hour 40 minutes
Yield
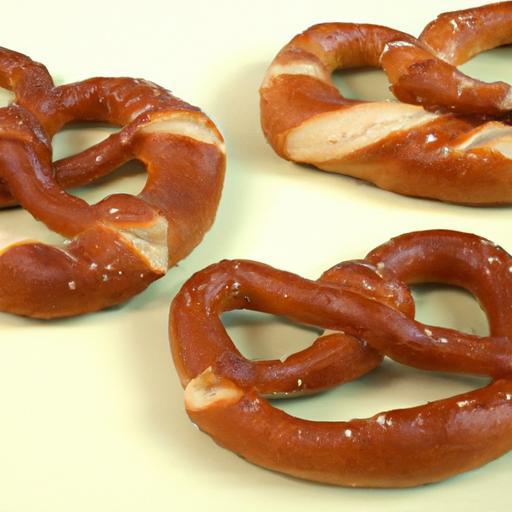
Makes 8 large,soft pretzels-perfect for sharing (or savoring solo!)
Difficulty Level
Medium – approachable for anyone ready to explore hands-on baking and shaping techniques.
Ingredients
- 1 ½ cups warm water (about 110°F)
- 2 ¼ tsp (1 packet) active dry yeast
- 1 tbsp granulated sugar
- 4 cups all-purpose flour, sifted
- 1 tsp fine sea salt
- 4 tbsp unsalted butter, melted
- 10 cups water
- ⅔ cup baking soda
- Coarse sea salt for sprinkling
Instructions
- Activate the yeast: In a large mixing bowl, combine warm water, sugar, and yeast. Stir lightly and let sit for about 5 minutes until foamy, signaling active yeast ready to work.
- Make the dough: Add the sifted flour, sea salt, and melted butter to the yeast mixture. Using a wooden spoon, mix until the dough begins to come together.
- Knead until smooth: Transfer the dough to a floured surface and knead by hand for 7-10 minutes until smooth, elastic, and just slightly tacky. Add a sprinkle of flour as needed to prevent sticking.
- First rise: Place dough in a lightly oiled bowl, cover with a damp cloth or plastic wrap, and refrigerate or keep in a warm spot for 1 hour, or until the dough doubles in size.
- Preheat your oven: Set the oven temperature to 450°F (232°C) and line two baking sheets with parchment paper.
- Shape the pretzels: Punch down the dough and divide into 8 equal pieces. Roll each piece into a 20-inch rope. Form each rope into the classic pretzel twist: make a U-shape, cross the ends twice, then fold them down onto the bottom of the U to create the signature knot.
- Prepare the baking soda bath: In a large pot, bring 10 cups of water and ⅔ cup of baking soda to a boil. Carefully drop each pretzel into the boiling bath, one at a time, for 30 seconds-this crucial step forms the glossy, golden crust.
- Bake: Place the pretzels on the baking sheets and promptly sprinkle with coarse sea salt. Bake for 10-12 minutes or until deep golden brown and irresistible.
- Cool and serve: Transfer pretzels to a wire rack to cool slightly.Serve warm with your favorite dips and toppings.
Tips for Success
- Water temperature matters: too hot will kill the yeast; too cold will delay rising. Aim for warm (110°F) water to wake your yeast gently.
- Don’t skip the soda bath: This alkaline wash not only deepens flavor but locks in moisture and gives the pretzels their classic sheen and chew.
- Perfect your twist: Use even pressure when rolling ropes; this ensures consistent thickness for uniform baking and elegant shapes.
- Make ahead: dough can be refrigerated overnight for convenience-just bring it to room temperature before shaping and baking.
- Substitutions: For dairy-free prep, replace butter with coconut oil or a neutral vegetable oil with similar measurements.
Serving Suggestions
Present your soft pretzels fresh and warm, garnished with a sprinkle of flaky sea salt or a dusting of garlic powder for an aromatic twist.Dip generously into creamy honey mustard, sharp cheddar cheese sauce, or classic spicy mustard to heighten flavor contrast. For a sweet spin, try a side of cinnamon sugar butter or rich chocolate dipping sauce.

| Nutrient | Per Pretzel |
|---|---|
| Calories | 250 kcal |
| Protein | 7 g |
| Carbohydrates | 48 g |
| Fat | 4 g |
For more inspiration and pairing ideas with your homemade soft pretzels, check out our best dips for pretzels. To delve deeper into the science behind baking, King Arthur Baking company’s baking science guide is an invaluable resource packed with expert tips and explanations.
Q&A
Q&A: Twist & Taste – the Ultimate Guide to Homemade Soft Pretzels
Q1: What makes a soft pretzel different from a regular bread roll?
A: Soft pretzels are distinguished by their unique dough and that iconic twisted shape. Unlike regular bread rolls,pretzel dough typically has a higher moisture content and a distinctive boiling step in a baking soda bath before baking. This process creates the chewy texture and deep golden-brown, slightly crispy crust we all love.
Q2: Why do pretzels need to be boiled before baking?
A: Boiling pretzels briefly in an alkaline solution, like baking soda water, gives them their signature chew and glossy exterior. This step gelatinizes the surface starches, which then caramelize beautifully during baking, resulting in that classic flavor and texture.
Q3: Can I make pretzel dough without yeast?
A: Yes, but yeast is key to achieving that soft, airy crumb and conventional pretzel texture. Without yeast, the dough tends to be denser and less flavorful. For speedy versions, baking soda “pretzels” exist but won’t perfectly replicate the classic soft pretzel experience.
Q4: What’s the secret to the perfect pretzel twist?
A: The iconic pretzel shape comes from rolling the dough into a long rope and then creating a loop with the ends twisted twice before folding them down onto the bottom of the rope. Practicing on a floured surface helps keep the dough manageable, and don’t worry-each twist adds character!
Q5: How notable is the baking soda bath, and can I substitute something else?
A: The baking soda bath is crucial as it creates the alkaline surroundings that gives pretzels their color and flavor. While lye baths are traditional in commercial baking, they’re hazardous for home use. Baking soda is the safest and most effective alternative. Vinegar baths or plain water won’t produce the same results.
Q6: How do I achieve that perfect golden-brown crust without drying the pretzel out?
A: Timing and oven temperature are key. Bake at a high heat (around 425°F/220°C) for a short time (12-15 minutes) after the baking soda bath. This combination caramelizes the exterior swiftly,sealing in moisture while creating that beautiful crust.
Q7: Can I customize my pretzels with different toppings?
A: Absolutely! Classic coarse salt is a must for many, but you can get creative-try everything from sesame seeds, poppy seeds, or garlic flakes to parmesan cheese or cinnamon sugar for a sweet twist. Just add toppings immediately after the baking soda bath and before baking so they adhere properly.
Q8: What’s a good dipping sauce for homemade pretzels?
A: Soft pretzels are perfectly paired with a variety of dips. Classic choices include spicy brown mustard, cheesy beer dip (without any pork-based ingredients), honey mustard, or a flavorful herb-infused cream cheese. The dipping possibilities are endless, so feel free to experiment!
Q9: Can I freeze soft pretzels?
A: Yes! After baking, let your pretzels cool completely, then freeze them in an airtight bag.Reheat in the oven to bring back that fresh-baked softness and flavor. You can also freeze uncooked,shaped pretzels-just thaw,boil,and bake when ready.
Q10: What tips do you have for beginners making pretzels for the first time?
A: Don’t be discouraged by initial twists and turns-pretzel shaping improves with practice! Use a kitchen scale for precise measurements and make sure your yeast is active for a nice rise. Remember the baking soda bath; it’s the magic step! Lastly, enjoy the process-there’s nothing like the aroma of home-baked pretzels filling your kitchen.
wrapping Up
With each soft, golden bite of your homemade pretzels, you’re not just tasting a snack-you’re savoring a tradition twisted anew, crafted by your own hands. From mastering the perfect dough to achieving that iconic glossy finish, this guide has turned the art of pretzel-making into an approachable, delicious adventure.So next time craving strikes, skip the store-bought and embrace the warmth of fresh-from-the-oven pretzels, where every twist tells a story and every bite is a celebration of flavor and craftsmanship. Happy twisting-and even happier tasting!